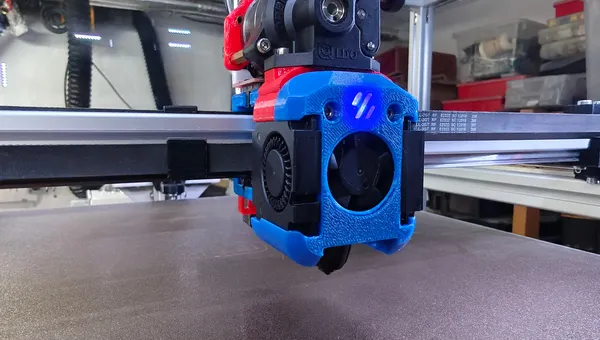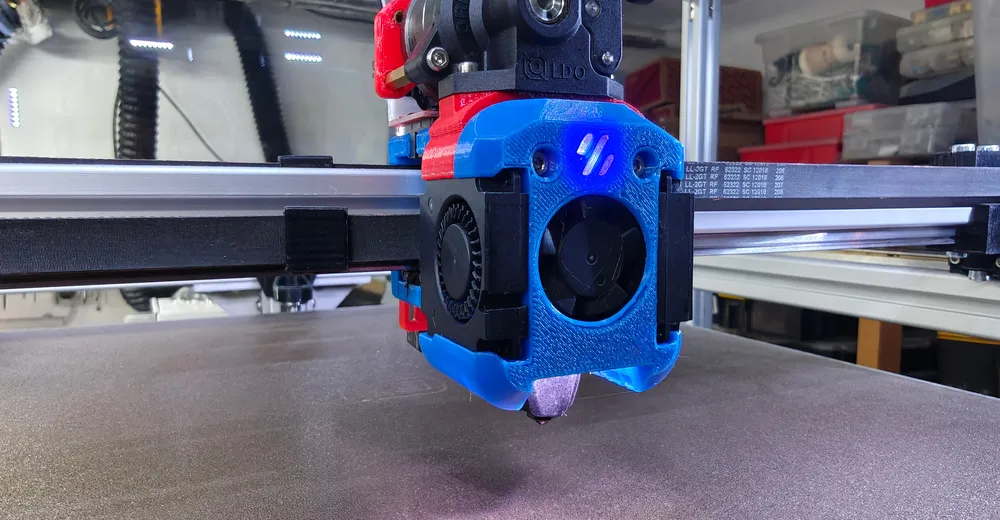
Three addressable LEDs on the toolhead show the printer's state – I use the Klipper plugin led_effect and the RGB output of my EBB36 CAN toolboard. The build (Dragon Burner + Orbiter + Rapido) is described in the Rapido 2F article.
What the LEDs should show
I have three LEDs on the print head: two as nozzle lighting (LED 1–2) and one as a status/logo LED (LED 3). The nozzle LEDs glow white while printing, but breathe in a color depending on the phase – cyan while homing, orange while heating. The status LED is green during active printing and drops to standby afterwards. So I can tell from across the workshop whether the printer is heating, printing or done – and get real light on the part as a bonus.
Prerequisites
You need the klipper-led_effect plugin by Julian Schill (easiest installed via KIAUH) – it adds the building blocks [led_effect], SET_LED_EFFECT and STOP_LED_EFFECTS. Plus a few addressable LEDs (WS2812/Neopixel), which many toolhead shrouds like the Dragon Burner already provide for, and a free RGB output on the mainboard or toolboard. On my build they hang off the EBB36 CAN toolboard – the whole printer is controlled by a BTT Octopus.
Ad · Affiliate link – if you buy through it, I may earn a commission. It doesn’t change the price for you.

Defining the Neopixel on the CAN toolboard
First declare the LEDs as [neopixel]. The pin is the toolboard's RGB output (on the EBB36 PD3); over CAN it's addressed as toolboard0:PD3. The color_order matters: if it's wrong, red and green are swapped – many cheap LEDs are GRB instead of RGB.
[neopixel leds_tool0]
pin: toolboard0:PD3        # RGB output on the EBB36 CAN toolboard
chain_count: 3            # 2x nozzle + 1x status/logo
color_order: GRB          # wrong order -> colors swapped
initial_RED: 0.0
initial_GREEN: 0.0
initial_BLUE: 0.0
Defining effects with led_effect
Instead of switching the LEDs directly, I define a [led_effect] per state. The handy part is the per-effect LED selection: (3) addresses only the status LED, (1-2) only the nozzle LEDs. As layer type I use static (steady color) and breathing (gentle pulsing). Here are three representative effects:
# LED 3 = status/logo, LEDs 1-2 = nozzle lighting
[led_effect activegreen_tool0]
leds:
    neopixel:leds_tool0 (3)
autostart: false
frame_rate: 24
layers:
    static     0 0 top (0.0, 1.0, 0.0)   # green = active

[led_effect nozzle_heating_tool0]
leds:
    neopixel:leds_tool0 (1-2)
autostart: false
frame_rate: 24
layers:
    breathing  3 1 top (1, 0.18, 0)      # orange breathing = heating

[led_effect nozzle_homing_tool0]
leds:
    neopixel:leds_tool0 (1-2)
autostart: false
frame_rate: 24
layers:
    breathing  3 1 top (0.0, 0.8, 1.0)   # cyan breathing = homing
Status macros for switching
So I can call the effects conveniently, I wrap them in small status_* macros. Important: clean up with STOP_LED_EFFECTS before setting a new effect, otherwise effects stack. This is what the active and standby states look like:
[gcode_macro status_active_tool0]
gcode:
  STOP_LED_EFFECTS LEDS="neopixel:leds_tool0"
  SET_LED_EFFECT EFFECT=activegreen_tool0 RESTART=1   # status green
  SET_LED_EFFECT EFFECT=activeon_tool0 RESTART=1      # nozzle white

[gcode_macro status_standby_tool0]
gcode:
  STOP_LED_EFFECTS LEDS="neopixel:leds_tool0"
  SET_LED_EFFECT EFFECT=standbybreathing_tool0 RESTART=1
Hooking it into the print sequence
The actual trick: call the macros at the right points in the print sequence. At the start of START_PRINT the homing status during homing/Z-tilt/mesh, just before the first layer the active status; in END_PRINT back to standby:
[gcode_macro START_PRINT]
gcode:
    status_homing_tool0        # cyan breathing during homing/Z-tilt/mesh
    G28
    Z_TILT_ADJUST
    BED_MESH_CALIBRATE
    # ... heat, intro line ...
    status_active_tool0        # white + green = printing

[gcode_macro END_PRINT]
gcode:
    # ... cool down, park ...
    status_standby_tool0       # back to standby
What I left out
- Name/color leftovers: in my config one effect is called
standbyyellow_tool0but is actually set to red – such copy-paste leftovers from other people's profiles are normal, just check the RGB values. - Progress bar: there's also the klipper-neopixel plugin (digitalninja) with
NEOPIXEL_DISPLAYfor real percentage bars – but that needs a longer LED strip; for three LEDs on the toolhead led_effect is the better choice. - Power budget: three LEDs are uncritical; long strips draw a fair bit of 5 V – then don't just hang them off the toolboard.
- Test color_order: can vary between GRB and RGB depending on the LED batch.
Conclusion
Little effort, big everyday benefit: you see the printer's state at a glance and get real light on the part at the same time. led_effect is flexible – define the effects once, wrap them in the status_* macros, hook them into the print sequence, done. If you like, you can later add error/pause states (e.g. red blinking on M600) the same way.
Ad · Affiliate link – if you buy through it, I may earn a commission. It doesn’t change the price for you.