My first message to Claude: "I unfortunately had to reinstall the RPi on my CNC router … can you set the system up again?" The SD card was dead, the Pi was running a fresh Raspberry Pi OS – and nothing else.
In the end CNCjs, homing, the probe and the kiosk were all working again. The actual working time was a few hours. On my own I would have needed considerably longer for the same stretch – above all for troubleshooting. This article is not a tutorial to replicate, but an honest report: what worked, where it got stuck and where the AI was wrong.
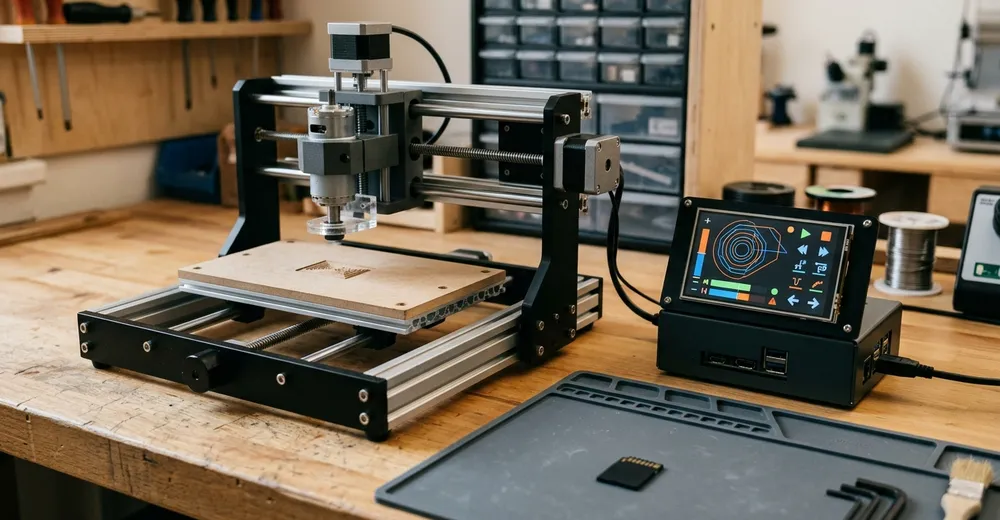
The setup
| Component | What's installed |
|---|---|
| Controller | Arduino Uno with CNC shield, Grbl 1.1h (self-compiled) |
| Connection | USB via CH340 to the Pi |
| Host | Raspberry Pi 3B |
| Interface | CNCjs 1.11.5 as a systemd service, port 8000 |
| Display | first Waveshare 480×800 with resistive SPI touch, later 7-inch HDMI with USB touch |
| Kiosk | Chromium under labwc (Wayland), autologin |
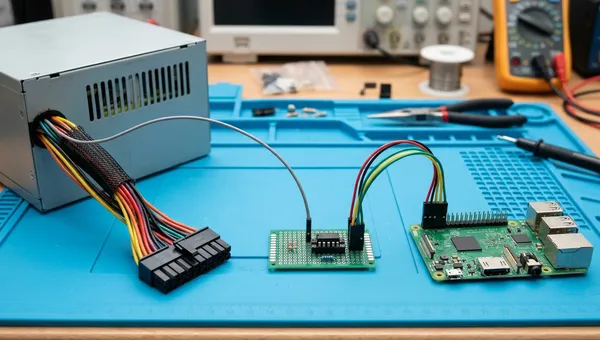
| Power supplies | converted ATX supply for the motors, relay for the spindle – both switched by the Pi |
| Camera | Pi camera module v1 (ov5647) as MJPEG stream |
First, back up what isn't on the Pi
The first step was not an installation but a backup. The actual machine parameters – steps per millimetre, travel limits, homing, work offsets G54 to G56 – are not on the Pi but in the Arduino's EEPROM. The reinstall had not wiped them. A broken Arduino or an accidental $RST=* would. So first read everything out and put it aside:
# In der Grbl-Konsole (z. B. CNCjs) – Ausgabe komplett in eine Datei kopieren
$$     # alle Einstellungen ($0 … $132)
$#     # Nullpunkte G54–G59, G28/G30, Werkzeuglängen-Offset
$I     # Version und Kompilier-Optionen, z. B. [OPT:,15,128]
This backup paid off later: after a short circuit at the shield (more on that below), I could verify within a minute that all 34 parameters were unchanged.
The second find was two old backups from 2023 – from the time when the Pi still ran Klipper/Moonraker or OctoPrint. They contained what nobody else knew any more: which GPIO switches which power supply and where the emergency stop is wired.
# moonraker.conf (2023)
[power Antriebe]
pin: !gpio26
[power Spindel]
pin: gpio20

# OctoPrint config.yaml (2023), gekürzt
psucontrol:  { onoffGPIOPin: '26', invertonoffGPIOPin: true }
physicalbutton: { name: Emergency STOP, gpio: '16', buttonMode: Normally Closed }
How the collaboration worked
Claude Code ran on my server and had an SSH key for the Pi. I stood at the machine: re-plugging cables, pressing buttons, tapping the display, taking photos of the shield. Claude installed things, wrote scripts, read kernel logs and Grbl status lines – and, crucially, could check for itself what was happening on the display.
These very tools saved the most time, because they made questions to me unnecessary:
grimwithWAYLAND_DISPLAYset delivers a screenshot of the kiosk – without me having to photograph anything.- Chromium with
--remote-debugging-port=9222shows JS errors and the DOM state of the page. - A small touch logger records every touch to a log file, no matter when I tap.
A lesson for both sides: the instructions come before the measurement. Two empty measurement windows were caused solely by a measurement script already running while I was still reading what I was supposed to do.
Trap 1: The touch misses
On the Waveshare panel the picture comes in over HDMI, but the touch goes through the pin header via SPI (XPT2046, driver ads7846). Which chip-select line and which interrupt pin – no manual that matched the panel said. /proc/interrupts gave it away: 1118 triggers on pinctrl-bcm2835 25 Edge ads7846 – so CS1 and PENIRQ on GPIO 25.
After that the touch worked, but the corners were crossed. From two drawn strokes, Claude deduced: mirror X and Y (invx, invy). The values were in config.txt – and never arrived. They were missing in the device tree, even though xmin from the same line had arrived.
The overlay line was 127 characters long. The Pi's firmware cut it off after character 98 and discarded the rest – no error message, no log entry. Fix: spread the parameters over following lines with dtparam=; they apply to the overlay above.
When the mirroring finally arrived, things did not get better, just wrong in a different way. Only a calibration page with five crosshairs clarified the picture: the centre hit to within a few pixels, while the corners were swapped crosswise. That is the signature of one 180-degree rotation too many. The compositor (wlroots in labwc) already rotates the touch input along with the screen rotation transform 270 – the driver's own mirroring was a duplicate.
The limit values finally came from a line fit over all five points, not from single strokes (where you naturally never quite reach the edges):
# /boot/firmware/config.txt – kein invx, kein invy, kein swapxy
dtoverlay=ads7846,cs=1,penirq=25,penirq_pull=2,speed=50000,pmax=255
dtparam=xohms=150,xmin=142,xmax=3944,ymin=199,ymax=3901
Result: at most 5 px deviation horizontally and 7 px vertically, compared to 695 px horizontally and 354 px vertically before. I later swapped the panel for a 7-inch HDMI display with USB touch anyway – a CNC interface is no pleasure on a resistive touchscreen. Important here: comment out the overlay. As long as it loaded, two touchscreens reported in, and the orphaned old one delivered random values. On an interface that can move a router, you don't want that.
Trap 2: The motor power supply can't be switched
Homing failed because the stepper motors had no power. The drives' power supply is a converted ATX supply, switched on via PS_ON – and this line sits at 5 V inside the supply. It hung directly on GPIO26 for years and eventually destroyed the pin.
We found that without switching a single output: all GPIOs as inputs, once with pull-up, once with pull-down. Free pins follow, wired ones don't. The solution is a PC817 optocoupler on GPIO19. The whole story with circuit and script is in its own article: Switching an ATX Power Supply with a Raspberry Pi: PS_ON and a PC817.
Before the backups were on the table, GPIO16 was the best candidate for the power supply, and Claude wanted to drive it as an output to ground. But the closed emergency-stop contact was wired from GPIO16 to 3.3 V – a short circuit through the output driver. A question before driving it prevented that. Since then the rule is: measure passively first, then switch.
Trap 3: The Z probe doesn't trigger
The probe is simple: a metal plate on Grbl's probe input A5, an alligator clip on the cutter to ground. We still searched for hours – for a label "A5" or "Probe" that doesn't exist on the shield. There the pin is called SCL, because A5 on the Uno is also the I²C clock line. Claude only recognised this from a photo of the shield.
Two things happened on the way:
- Short circuit. The ground wire landed one pin off, on 5 V. The kernel reported
over-current changeover 1300 times, plusUndervoltage detected, the CH340 vanished, the motors clicked. Unplug, breathe, check the parameters against the backup: all 34 identical. - Wired the wrong way round. 10 kΩ to ground and 5 V through the switch – sounds reasonable, but doesn't work. Grbl enables the internal pull-up (20–50 kΩ) anyway. Together with 10 kΩ that gives an idle level of 0.83 to 1.67 V, right around the switching threshold. The input permanently showed "touched".
The working wiring is the simplest:
# Beschaltung (Grbl $6=0: Ruhe = High über internen Pull-up, Masse = berührt)
#   Plättchen --[1 kOhm]-- SCL (= A5)        Krokodilklemme -- GND

# Prüfung ganz ohne Bewegung: Statusbericht abfragen
?            # Ruhe:       <Idle|WPos:...|F:0>       (kein Pn)
? # berührt: <Idle|WPos:...|Pn:P|...>The state of the probe input appears only in the periodic status report. CNCjs hides these reports in the console – so it's normal that "nothing happens" when you touch the plate. Claude therefore wrote a small monitoring script that reads the status lines along and logs every Pn: edge. A cross-check with a limit switch (Pn:Y) showed that the script itself works.
In the end, six clean edges within half a minute: two via a jumper directly at the shield, four by touching the plate. After that I created the probing macro in CNCjs. Important: it has not yet been tested in actual milling operation. Only the clean Pn:P edges are verified; I haven't done a real probing move ([PRB:…:1]) yet:
; Z-Antasten, Plättchen 1,50 mm dick – NOCH NICHT im Fräsbetrieb getestet
G91                  ; relativ
G38.2 Z-20 F50       ; langsam nach unten bis Kontakt
G10 L20 P1 Z1.50     ; aktuelle Position = Plättchendicke in G54
G0 Z5                ; freifahren
G90                  ; zurück auf absolut
Trap 4: The kiosk stays white
Three times the display showed only white, and three times it was something different:
- Token and patience. The pendant interface TinyWeb needs an access token, otherwise
/api/commandsanswers with403and the page stays white. A hard-coded token expires after 30 days. Solution: a small intermediate page fetches a fresh token viaPOST /api/signinon every start and redirects. After that it still stayed white – TinyWeb takes over a minute to load on the Pi 3. The screenshots fell exactly into that window. - Resolution. The scaler in the 7-inch display reports 1920×1080 via EDID. That overwhelms the Pi 3 with the full CNCjs interface. Solution: fix the mode in kanshi.
- Start timing. CNCjs opens its port before it is really ready. The autostart only waited for the port, Chromium loaded too early – and never reloads a white page on its own.
# ~/.config/kanshi/config
profile {
  output HDMI-A-1 mode 1024x768
}

# ~/.config/labwc/autostart (Auszug): warten, bis CNCjs wirklich antwortet
until curl -sf -X POST http://localhost:8000/api/signin | grep -q '"token"'; do
  sleep 2
done
sleep 10
chromium --kiosk --app=http://localhost:8000/ \
  --password-store=basic --remote-debugging-port=9222 &
As a safety net, a small watchdog also runs. Every 30 seconds it queries via the DevTools interface how many visible characters are on the page – about 1300 when filled, 0 when empty. If the page is empty twice in a row, it reloads it and then pauses for two minutes.
We didn't just test this on paper: page content deliberately deleted, and the log reported 16:22:47 Seite wirkt leer (0 Zeichen), 30 seconds later lade die Seite neu. The interface was back, including the connection to the controller.
The order of checks for next time: first wlr-randr (which mode?), then a screenshot with grim, then restart only the browser. Never restart cncjs.service just to fix the kiosk – that cuts the connection to the controller and resets the Arduino.
Where the AI got it wrong
Claude did a lot right during the rebuild. But a report without the mistakes would be whitewashed. The most important ones:
- "TinyWeb is incompatible" – hastily concluded from a white screenshot. The DOM was long since populated; the page just needed longer than the screenshot allowed.
- "invx and invy are needed" – deduced from two strokes. Only the 5-point measurement revealed the double rotation.
- "GPIO16 as an output to ground" – the near short circuit at the emergency stop.
- "GPIO26 is dead" – said too early, while the wire was still connected. It turned out to be true, but it was only proven with the cable unplugged.
- Rows on the pin header swapped. The even pins (e.g. 36, 38, 40) are the outer row. Claude had described it the other way round, and when re-plugging I ended up on the wrong pin. Better is an instruction without counting: "the pin directly opposite, same height".
- Own measurement error: A second monitoring run started in parallel overwrote the log file of the first.
What defused the mistakes was the same every time: questions before risky steps, measurements instead of assumptions, and tests in which the fault is deliberately provoked. The AI is quick at guessing – the value only arises when it can refute its own guess.
What I'll do differently in future
- The machine is now documented. Pin assignments, services, scripts and pitfalls are in my notes system – no longer just on the SD card.
- Back up Grbl parameters regularly. They are the only configuration that can't be reconstructed from backups.
- Connectors. Individual Dupont sockets came loose three times during the rebuild. All control lines will get a common connector housing with strain relief.
- Power supply. The Pi 3 is barely supplied, and the Arduino with two relay modules hangs off its USB. Both get their own, stronger supply – then the short circuit at the shield wouldn't even have reached the Pi.
- CNCjs has no login out of the box. With
allowRemoteAccess, anyone on the LAN can move the router. It belongs in its own VLAN or behind a login.
And the SD card itself: on the next machine that gets a Pi, I'll use a Pi 5 with NVMe instead of a card that eventually dies.
Ad · Affiliate link – if you buy through it, I may earn a commission. It doesn’t change the price for you.

Hardware: Raspberry Pi 3B, Arduino Uno with CNC shield, Grbl 1.1h, CNCjs 1.11.5, Chromium under labwc, Waveshare panel 480×800 (XPT2046 via SPI), later 7-inch HDMI display with USB touch. Tool: Claude Code via SSH from the home server.
All numbers come from the logs and measurements during the rebuild. The probing macro is the exception (see above, still untested). The numbers apply to this machine, not in general.
The router is running again, and it is better documented than ever. What CNCjs can't do is CAM: for simple circles, slots and pockets I have meanwhile built a small G-code generator with a web interface on the Pi. That will get its own article.
Ad · Affiliate link – if you buy through it, I may earn a commission. It doesn’t change the price for you.