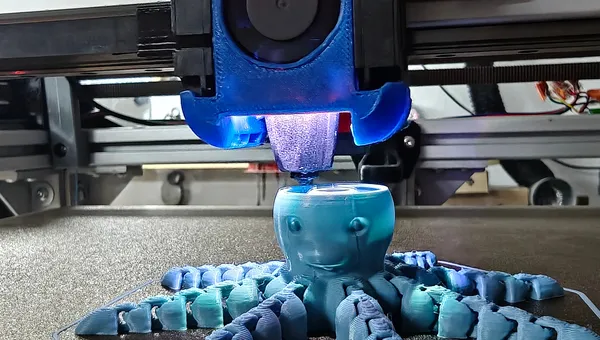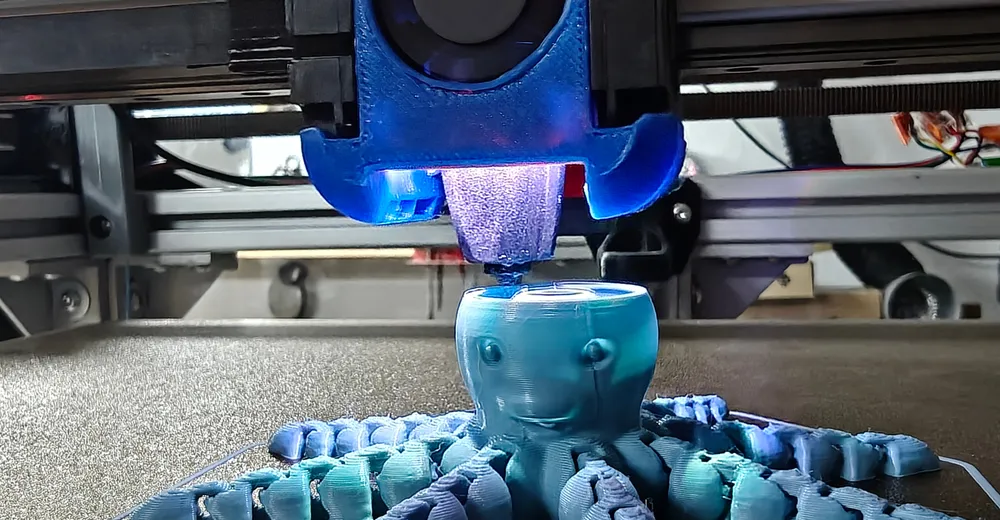
A chain octopus refused to stay on the print bed. The cause was one missing line in the Klipper configuration – and the road there led through three false leads, a crashing CAN bus and a config file that was never even loaded.
Two measurements of the same print bed, ten hours apart. Between them lies exactly one added config line:
| Measurement | Mean | Meaning |
|---|---|---|
| before | −0.144 mm | entire surface below zero – constant offset |
| after | −0.001 mm | scattered around zero – real shape correction |
The difference is 143 micrometres. Less than two sheets of paper. It was enough to tear four prints in a row off the bed.
The missing zero reference
Klipper adds the bed mesh value to the requested Z height. For that to be a shape correction rather than an offset, the mesh has to be normalised to the point where the printer found its Z zero. That's exactly what zero_reference_position is for. Without that line, Klipper doesn't normalise – and every measured value acts as an absolute.
My configuration didn't have it. Under the object's footprint the mesh averaged −0.144 mm, and not one of the twelve probe points there was above zero. So the nozzle ran 0.14 mm lower than the G-code said, across the whole surface.
# btt_eddy.cfg
[bed_mesh]
horizontal_move_z: 2
speed: 200
zero_reference_position: 199, 200 # same as safe_z_homeA correctly normalised mesh scatters around zero. If yours is entirely negative or entirely positive, that's not a warped bed – it's a missing zero reference.
The test is cheap: run BED_MESH_CALIBRATE and look at the mean. A real bed is higher in some places and lower in others. A mesh whose sign never changes doesn't describe a bed shape.
Ad · Affiliate link – if you buy through it, I may earn a commission. It doesn’t change the price for you.

Why PETG was forgiving
The bug had been in the configuration for months without anyone noticing. The reason is arithmetic: as long as the first layer was set thick enough, there was still a usable layer left after subtracting the 0.14 mm.
Effective first layer = nominal value + mesh mean under the object
| nominal | before | after | Result | |
|---|---|---|---|---|
| PETG, successful | 0.40 mm | 0.256 mm | 0.399 mm | held |
| PLA, first attempt | 0.22 mm | 0.076 mm | 0.219 mm | came loose |
| PLA, current profile | 0.32 mm | 0.176 mm | 0.319 mm | holds |
A nozzle gap of 0.076 mm for a 0.22 mm layer means the nozzle blocks its own outlet. Whatever comes out is smeared rather than laid down. It doesn't stick because there's almost nothing there that could stick.
The bitter part: I triggered it myself. My very first change that evening was lowering the first layer from 0.40 to 0.20 mm – "for better squish". That was the change that pulled the bug out of hiding. It had been there all along; I just took away its safety margin.
The second, hidden zero point
After the mesh fix, adhesion was fine – but the first layer was now noticeably too loose. My first reaction was to recommend a babystep down. That was too quick a guess: the printer showed an active Z offset of +0.1014 mm, even though nobody had set anything and a firmware restart had verifiably reset it to zero shortly before.
In Klipper, homing_origin is set exclusively by SET_GCODE_OFFSET – not by the mesh, not by Z tilt, not by the probe measurement. So something had issued that command. Searching the loaded macros turned up a package that ships with the Eddy install and overrides Klipper's built-in command:
[gcode_macro SET_GCODE_OFFSET]        # overrides the built-in command
[gcode_macro SET_Z_FROM_PROBE]        # applies it during homing
[gcode_macro Z_OFFSET_APPLY_PROBE]    # writes it to variables.cfg
[delayed_gcode RESTORE_PROBE_OFFSET]  # restores it on startup

# variables.cfg
[Variables]
nvm_offset = 0.10000000000000002
The numbers add up exactly:
probe.last_z_result     +0.0014 mm   # the current Eddy measurement
runtime_offset          +0.1000 mm   # saved, from variables.cfg
                        ----------
homing_origin Z         +0.1014 mm
So it wasn't operator error, but a value from an earlier calibration that gets silently restored on every start. And now it gets interesting – because why was it at +0.100?
| Two corrections meant to compensate for the same thing | before the mesh fix | after the mesh fix |
|---|---|---|
| Mesh under the object | −0.144 mm | −0.001 mm |
saved nvm_offset | +0.100 mm | +0.100 mm |
| net | −0.044 mm | +0.099 mm |
The saved +0.100 mm had been dialled in to compensate for the un-normalised mesh. It made the bug half-bearable for years – and kept it invisible in the process. Once the cause was fixed, the compensation itself became the bug.
That's exactly the trap with two stacked corrections: as long as they cancel each other out, everything looks normal. Fix one, and the system tips the other way – and it looks as if the fix caused the problem.
After normalisation, the correct value for nvm_offset is close to zero. Knowing which macro package is loaded also changes the procedure: this Z_OFFSET_APPLY_PROBE doesn't write to the probe section of printer.cfg like the original does, but to variables.cfg via SAVE_VARIABLE. No SAVE_CONFIG, no restart.
SET_GCODE_OFFSET Z_ADJUST=-0.02   # in steps, during the first layer
Z_OFFSET_APPLY_PROBE              # writes runtime_offset to variables.cfg
Measuring before it's warm
A third point belongs in the same chain, because it makes every calibration useless. The start macro had an order of steps that doesn't stand out in everyday use:
M104 S{HOTEND}      ; heat nozzle, don't wait
M140 S{BED}         ; heat bed, DON'T wait
G28
Z_TILT_ADJUST
BED_MESH_CALIBRATE  ; <- the bed isn't warm yet at this point
; ...
M190 S{BED}         ; only NOW wait for the bed
The log shows what that means: target=60 temp=37.1 pwm=1.000. The mesh was taken at 37 °C, the print ran at 60.
The real damage isn't the measurement error, but its inconsistency. How warm the bed is during probing depends on how long the machine ran beforehand. A Z offset dialled in today is wrong tomorrow – you're calibrating against a moving target.
M140 S{params.BED}                     ; heat bed
M104 S{[150, params.HOTEND|int]|min}   ; only preheat the nozzle
M190 S{params.BED}                     ; WAIT for bed temperature
G4 P120000                             ; 2 min heat soak
G28
Z_TILT_ADJUST
BED_MESH_CALIBRATE
M109 S{params.HOTEND}                  ; only now go to print temperature
The nozzle stays at 150 °C during probing – warm enough that heating up afterwards is quick, cool enough that it doesn't ooze onto the bed while probing. Cost: two to three minutes per print.
The chain of three corrections
What remained in the end is less a list of settings than a chain of three corrections that had masked each other for months: a mesh without a zero reference, a saved offset that compensated for it, and a first layer thick enough for both to work together. It took just one change at the weakest link of that chain – and everything fell apart at once.
By the way, the saved nvm_offset is still at +0.100 mm, even though after normalisation it should be close to zero. It's by far the largest remaining error in the Z chain – and the cheapest to fix.
Printer: HevORT, Klipper v0.13.0-743, BTT Eddy USB, Phaetus Rapido 2, 0.4 mm nozzle. Slicer: OrcaSlicer 2.4.2.
All numbers come from measurements on this machine – from klippy.log, the Moonraker API and the slicer's feature breakdown. They apply to this printer, not in general.
This series
One evening of troubleshooting a chain octopus produced four topics that can each be read on their own:
- The missing zero reference – this article
- Print-in-Place: Layer Height Decides Whether Joints Move
- OrcaSlicer & Klipper: 34 % less print time (coming soon)
- Seven fallacies in Klipper troubleshooting (coming soon)
Ad · Affiliate link – if you buy through it, I may earn a commission. It doesn’t change the price for you.