This article is part of the Home Assistant Guide – the curated learning path for your smart home.
Why measure particulate matter on your own network?
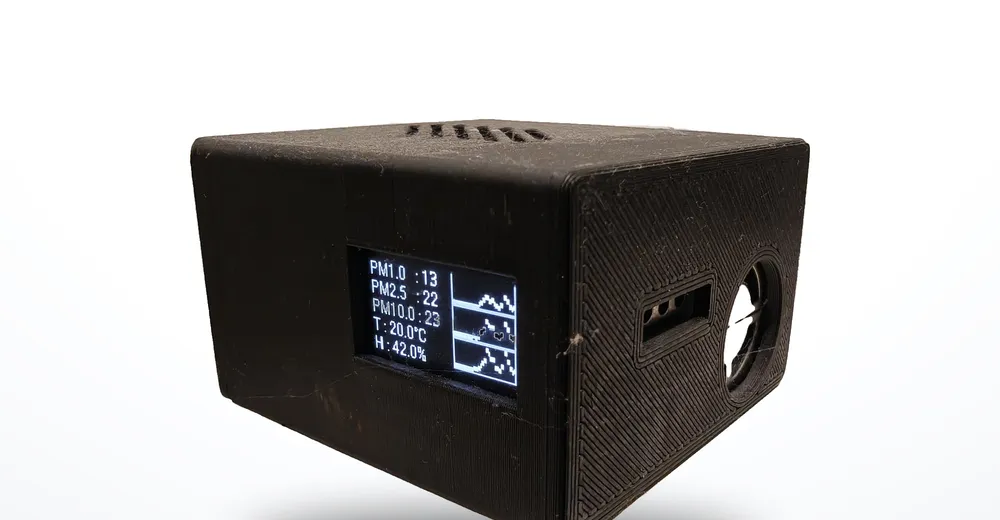
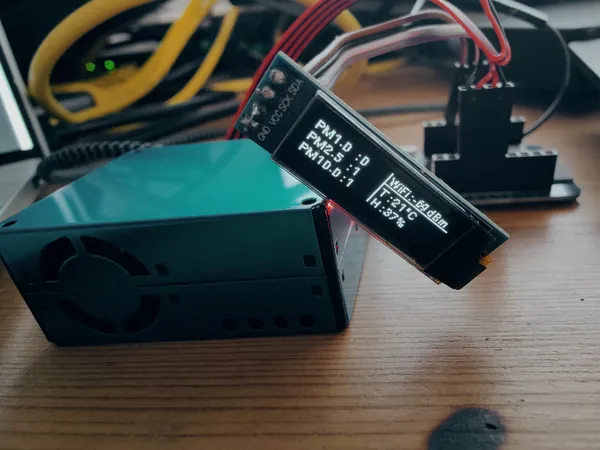
There are plenty of particulate-matter measuring stations online – but if you want to monitor the air quality in your own rooms, you need local sensors. The PMS5003T by Plantower measures particulate matter (PM1.0, PM2.5, PM10) plus temperature and humidity in one compact module. Connected to an ESP32, configured with ESPHome and integrated into Home Assistant, you have a complete air-quality station in an hour – with an OLED display for a quick glance and a 3D-printed enclosure.
Ad · Affiliate link – if you buy through it, I may earn a commission. It doesn’t change the price for you.

Ad · Affiliate link – if you buy through it, I may earn a commission. It doesn’t change the price for you.

Ad · Affiliate link – if you buy through it, I may earn a commission. It doesn’t change the price for you.

Hardware
- PMS5003T particulate-matter sensor (measures PM1.0, PM2.5, PM10 + temperature + humidity)
- ESP32 microcontroller (e.g. ESP32-DevKit)
- SSD1306 OLED display (128x32 or 128x64, I²C)
- Cables, breadboard or soldering iron
- (Optional) 3D-printed enclosure – print-ready STL on Printables, FreeCAD source further down
The PMS5003T has 8 pins. The relevant ones are: Pin 1 (VCC, 5V), Pin 2 (GND), Pin 4 (RX) and Pin 5 (TX). The sensor runs on 5V, but the UART communication is 3.3V-compatible – it connects directly to the ESP32.
ESPHome configuration
The complete ESPHome YAML for the sensor, the OLED display and the Wi-Fi connection. The PMS5003T pinout is included as ASCII art in a comment – it helps with wiring:
#  PM Sensor port
#  -----------------
#  |       -----   |
#  |    8  | o |   |
#  |    7  | o |   |
#  |    6  | o |   |
#  |    5  | o |   |   5 - TX
#  |    4  | o |   |   4 - RX
#  |    3  | o |   |
#  |    2  | o |   |   2 - GND
#  |    1  | o |   |   1 - VCC
#  |       -----   |
#  -----------------

esphome:
  name: esp32-pm-sensor-01
  friendly_name: esp32-PM-Sensor-01

esp32:
  board: esp32dev
  framework:
    type: arduino

logger:

api:
  encryption:
    key: "xxx"

ota:
  password: "xxx"

wifi:
  ssid: !secret wifi_ssid
  password: !secret wifi_password
  ap:
    ssid: "Esp32-Pm-Sensor-02"
    password: "ztsQxEKlkaUj"

captive_portal:

i2c:
  sda: 19
  scl: 18

display:
  - platform: ssd1306_i2c
    model: "SSD1306 128x32"
    update_interval: 10s
    lambda: |-
        it.printf(0, 0, id(font_robo),  "PM1.0   : %.0f", id(pms_pm_1).state),
        it.printf(0, 11, id(font_robo), "PM2.5   : %.0f", id(pms_pm_25).state),
        it.printf(0, 22, id(font_robo), "PM10.0 : %.0f", id(pms_pm_10).state),
        it.line(64, 10, 128, 10),
        it.line(64, 0, 64, 32),
        it.printf(67, 11, id(font_robo), "T : %3.1f°C", id(pms_temperature).state),
        it.printf(67, 22, id(font_robo), "H : %3.1f%%", id(pms_humidity).state),
        it.printf(67, 0, id(font_robo_sm), "WiFi : %2.f dBm", id(wifi_signal_sensor).state);

font:
  - file: "gfonts://Roboto"
    id: font_robo_sm
    size: 9
  - file: "gfonts://Roboto"
    id: font_robo
    size: 10

uart:
  rx_pin: GPIO17
  tx_pin: GPIO16
  baud_rate: 9600

sensor:
  - platform: wifi_signal
    name: WiFi Signal
    id: wifi_signal_sensor
    update_interval: 60s

  - platform: pmsx003
    type: PMS5003T
    id: pm_sensor
    pm_1_0:
      id: pms_pm_1
      name: "Particulate Matter <1.0µm Concentration"
      accuracy_decimals: 1
    pm_2_5:
      id: pms_pm_25
      name: "Particulate Matter <2.5µm Concentration"
      accuracy_decimals: 1
    pm_10_0:
      id: pms_pm_10
      name: "Particulate Matter <10.0µm Concentration"
      accuracy_decimals: 1
    temperature:
      id: pms_temperature
      name: "Environment temperature in °C"
    humidity:
      id: pms_humidity
      name: "Environment humidity in %"
    update_interval: 120s
Home Assistant integration
Once the ESP32 is flashed with ESPHome and on Wi-Fi, it's automatically detected in Home Assistant as a new device. All sensors – PM1.0, PM2.5, PM10, temperature, humidity and Wi-Fi signal – appear as entities and can be used in dashboards, automations and long-term statistics.


Enclosure: 3D printing with FreeCAD
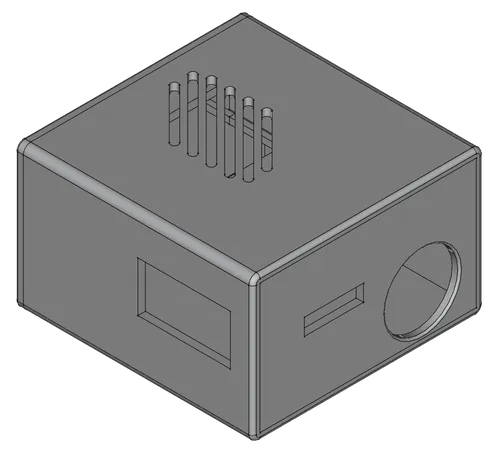
So the sensor doesn't just lie loose on the shelf, I designed a simple enclosure in FreeCAD. It holds the ESP32, the OLED display and the PMS5003T while leaving the sensor's air intake exposed. The print-ready STL files are on Printables; the editable FreeCAD source file can be downloaded right below:
What I left out
A few things deliberately not covered here:
- Calibration. The PMS5003T is factory-calibrated, but the temperature and humidity readings tend to deviate by 1–3 °C and 5–10 % respectively. If you need accurate values, calibrate against a reference device.
- Long-term stability. Laser-based PM sensors lose accuracy after 2–3 years. A topic for a follow-up article.
- Multiple sensors on one ESP32. Possible via the second UART – but the pin conflicts are fiddly.
Conclusion & outlook
The combination of PMS5003T, ESP32 and ESPHome is the most pragmatic path to a local air-quality station. No cloud account, no app, no subscription fees – the data stays on your own network and lands directly in Home Assistant. Thanks to the 3D-printed enclosure, the whole thing doesn't look like a tinkering-basement build either.
As a next step I plan to couple the PM data with an automation: switch on ventilation automatically when PM2.5 exceeds a threshold. That'll get its own article.
Ad · Affiliate link – if you buy through it, I may earn a commission. It doesn’t change the price for you.